Trying to figure out the best way how to catch fluke can be a long, frustrating process of trial and mostly error. Anyone who has targeted these flat bodied fish are likely familiar with two things: anxiously waiting and the gut-wrenching feeling of sensing a fish on the other end only to lose it as quickly as you felt it.
In order to save you this heart/headache and increase your chances of landing the doormat of your dreams, we’ve broken down the most important tips, tricks, and techniques for fluke fishing.
We’ll be covering how to catch fluke, when and where to catch them, the best rod/reel and bait rig setups, and fundamental techniques to help you catch more (and lose less) fluke.
When and Where To Catch Fluke
In order to most effectively target any fish species, it’s important to understand what kind of spots they typically live in and what time of year they’re most likely to be found in these spots. Without a solid grasp on these factors, your chances of catching a fluke are minimal regardless of whether you do absolutely everything else the right way.
When to Fish for Fluke
The migratory pattern of fluke is seasonal and dependent on the region you’ll be fishing in for them. Fluke (also known as summer flounder), can be found all over the east coast of the US.
During the winter months, they are found far offshore in waters ranging between 120 to 600 feet deep. As the waters warm up in the late spring/early summer, they begin to move inshore. Depending on where you live, the official fluke season for recreational fishing runs somewhere between May through October.
It’s important to keep in mind that depending on the time of year and your location, local regulations concerning size limits and daily bag limits will vary. Be sure to check out those numbers with the local fishing authorities.
Where to Fish for Fluke
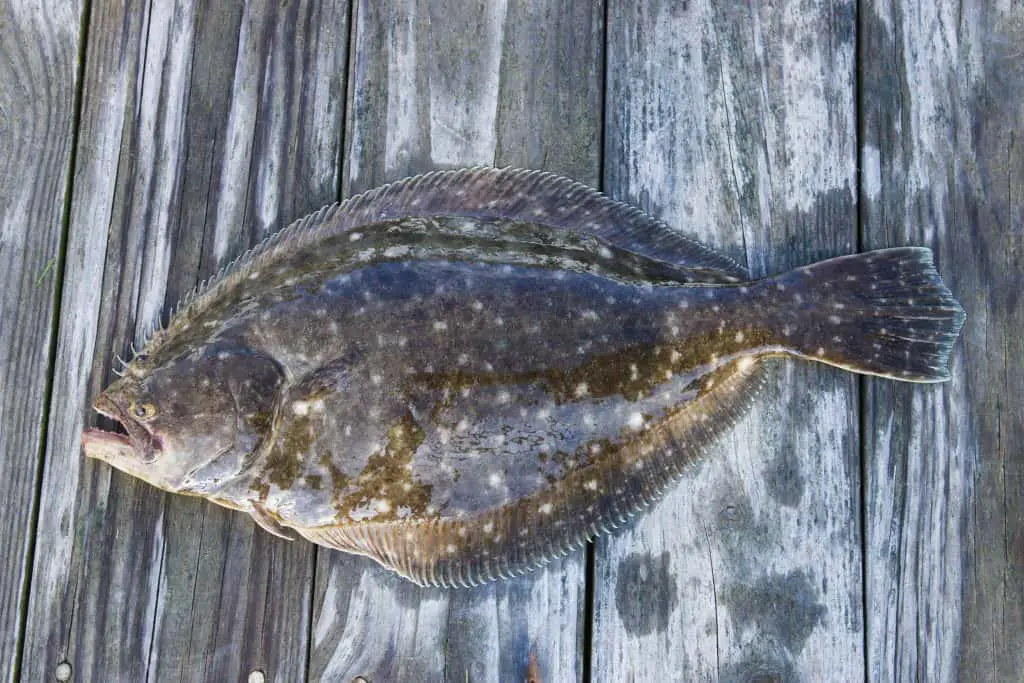
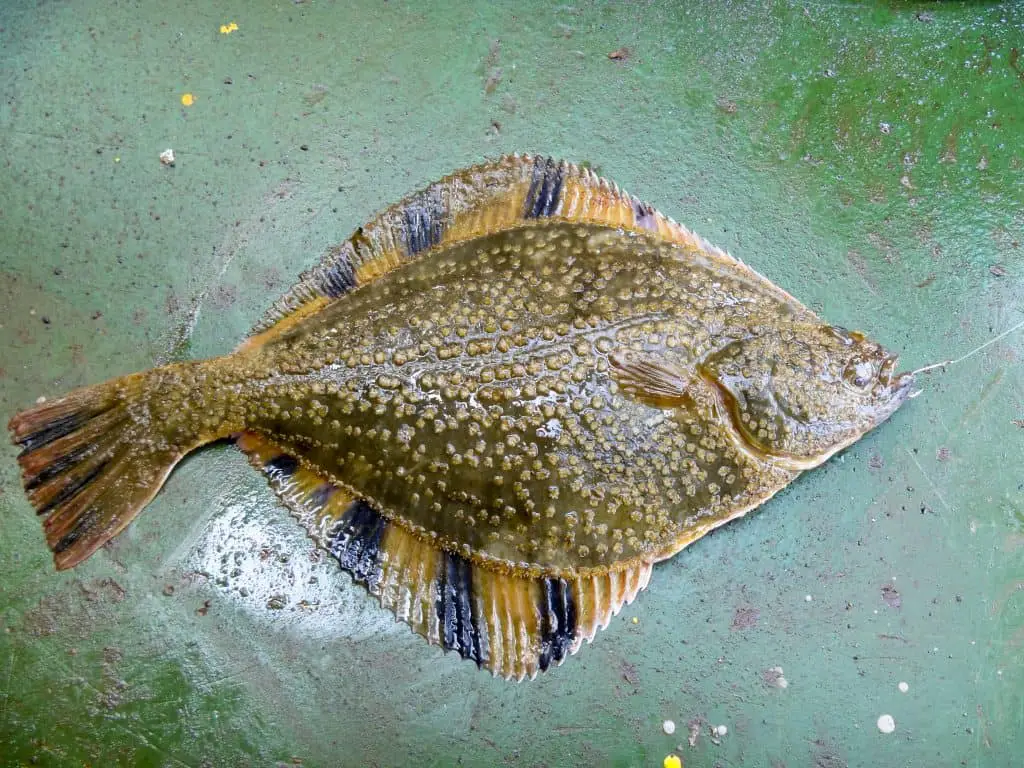
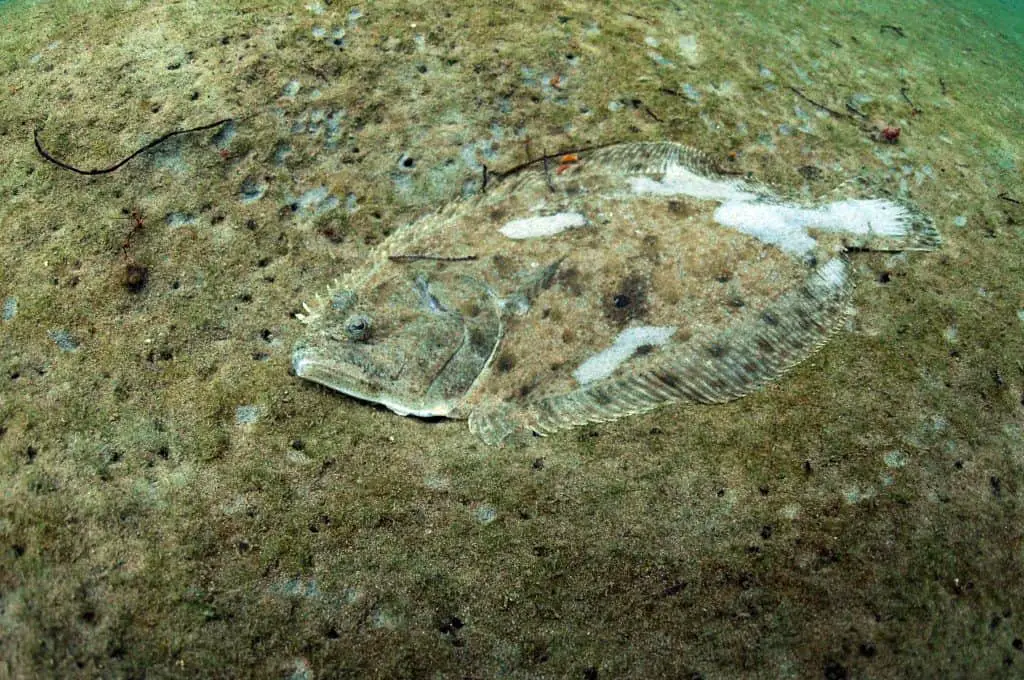
Fluke are flat, aggressive predator fish that lay and swim along the seafloor. Their shape and color creates camouflage that protects them from predators and provides stealth against prey.
In general, fluke feed very near the seafloor which means you’ll be keeping your bait rig close to the bottom.
More specifically, fluke prefer certain types of seafloor, and being able to identify and target these bottom types greatly increases your chance of hooking one.
I’m far from an expert on identifying fluke spots. So, here are a few suggestions from experienced fluke charter boat captains asked how to catch fluke:
- “Flounder tend to gather on the deeper side of a ledge, especially on a falling tide, around creek mouths that feed into larger bodies of water. ( Jason Colby– Massachussets)
- “Stay tight to structure where the debris or metal meets the sand.” ( Scott Newhall– New Jersey)
- “Target mouths of creeks on the ebb tide and on the incoming, deeper water over drop-offs and around structure with live baits.” ( Jeff Onley– North Carolina)
- “They gravitate to wherever the ocean feeds into marshes, jetties, docks, and riprap.” ( Tim Cutting– Georgia)
- “Fluke commonly lie on the down current side of structure within several feet of such structure.” ( Harvey Yenkinson– New Jersey)
To sum up those opinions, fluke tends to hang out by structures and elevation declines. They lay slightly down-current of the structure or dropoff which forces their prey to swim over the structure or beyond elevation drop where the fluke is strategically positioned and camouflaged for an attack from below.
How to Catch Fluke – Rod and Reel Setup
To a certain extent, the rod/reel combo you use for fluke is dependent on personal preference.
A typical setup is a rod around 5-7 feet and either a conventional or spinning reel. Choosing the setup that’s right for you is a matter of deciding:
- The size of fish you’re targeting (bigger fish=bigger rod)
- How much action (ability to bend without breaking) you like your rod to have
- The type of reel you feel most comfortable using.
Before you go out and buy a rod and reel specifically for fluke fishing, you may want to try out a few different setups by either renting, using a friend’s, or trying out options on your local half day charter boat. Or you could consider the drag net option.
How to Catch Fluke – Rig and Bait Options
Unlike your choice in rod and reel setup, the type of bait and rig you choose will depend on the wind, current, time of year, time of day, moon phase, region, tide, bottom type, water temperature…I think you get the picture. There are a dizzying number of factors that determine which setup works best at any given time.
The type of setup that works best in the context of how to catch fluke is dependent on how the fish happens to feel at the particular moment you dangle the setup in front of them. And that can change minute to minute. So unfortunately, there’s no definitive answer here.
If you’re fishing on a party boat, there’s a good chance the captain, mate, or one of the deckhands will be able to make a recommendation. Be sure to ask and take advantage of their experience and local knowledge.
You can also look around the boat to see what kind of setup is working best for other people. It’s far from a guarantee that the specifics of their rig is what’s causing them to catch all the fish. They may just be straight up good at fluke fishing. That said, if you see multiple people using pink bucktails all catching fluke when everyone else isn’t catching a thing, maybe try out a pink bucktail.
There’s wide speculation on what setup works best in certain situations. Seasoned fishermen with years of local knowledge may have a more intimate understanding of these incredibly nuanced factors, but chances are you don’t. It’s best to have a variety of options to experiment with.
Common Rigs for Catching Fluke
Bucktail + Bait Rig
This type of rig consists of a weighted bucktail attached to a leader which is tied to the main line by a swivel. It’s common that the bucktail hook will be tipped with some kind of stripped or artificial bait.
Depending on the location and fishing conditions, you can vary the setup by using different bucktail weights/colors and by switching the type of bait you tip the hook with. You’ll want to have a few bucktails and bait options on hand to make sure you’re covered if conditions change or if a certain color/bait combo isn’t effective.
The bucktail rig can be altered to include teaser hooks or a second, smaller bucktail, but the single baited bucktail is one of the most commonly used, tried, and tested fluke rigs out there.
3-Way (Basic Drift) Rig
This is another of the most commonly used, relatively simple fluke rigs. It consists of a 3-way swivel tied to the main line at the top swivel loop, a weight attached to the middle swivel loop, and a leader with hook tied to the bottom swivel loop.
You’ll sometimes see the hook covered with a soft, colorful rubber skirt often replicating squid. Using a colored skirt may make the bait more appealing and allows you to vary colors to experiment with effectiveness.
Like the basic bucktail rig, this rig can also be altered to include a teaser hook. Some people also like to use a fishfinder as opposed to attaching the weight directly to the swivel.
Common Bait for Catching Fluke
Strip
- Squid
- Clam
- Bluefish
- Bunker
- Sea robin
- Fluke (food is food eh?)
Live
- Bunker
- Minnows
- Snapper
- Killifish
- Pogies
Artificial
- Gulp Swimming Mullet (most commonly used)
- Gulp Grub Curly Tail Bait
- Tsunami Swim Fluke Jig
- Powerbait Power Minnow Scented Flounder Jig
- Tsunami Holographic Flounder Jig
- DOA Shrimp Flounder Bait
- Goture Fluke Jigs
Fundamental Fluke Techniques
So far we’ve covered how to put yourself in the right place, at the right time, with the right equipment, but now comes the question of what you can physically do to increase your chances of catching a fluke once your bait hits the water.
Here are a few fundamental techniques to keep in mind when presenting your bait rig and hooking fluke.
Hold the Bottom
As we mentioned earlier, fluke typically hunt close to the seafloor. So, that’s where you’re going to present your rig to them.
Let your rig sink down until you feel the weight hit the bottom, and then set your line. The key here is to make sure the weight stays on the bottom without dragging and drifting away from or under the boat.
Once you’ve hit bottom, your line should be vertical and remain relatively close to the boat. On days with strong winds and currents, you may find that your line and rig moves quickly away from the boat or under it making it difficult or impossible to hold it at the bottom without dragging. If you feel this happening, it might mean you need a heavier sinker or bucktail.
Bounce the Rig
Once you’ve established that you’re able to hold the bottom keeping the line relatively vertical and close to the boat, begin to bounce the rig off the bottom by lifting and dropping the tip of the rod. This serves the dual purpose of giving life to the rig and reaffirming it’s still on the bottom.
You can vary your bounce technique by changing:
- The speed and height of your lift
- The number of times you bounce it before letting it sit still on the bottom
- The length of time you let it sit on the bottom before you start bouncing it again
All these factors can be varied independently making the possibility for technique combinations nearly infinite.
There are many opinions when it comes to what the best bouncing technique is, but most people will agree that if your technique isn’t working, you might want to switch it up.
Determining the best bouncing technique is similar in a way to determining the most effective rig setup combo. It’s effectiveness is largely dependent on a multitude of environmental factors (water temperature, time of day, tide, etc) and can change minute to minute.
You’re attempting to present the rig in a way that will appeal most to the fluke. Sometimes they’ll want to aggressively strike at a more active and dramatically moving rig. Other times they may want to lazily scoop it up off the bottom.
There’s no substitute for time and experience when it comes to establishing a bouncing technique, or better yet, a handful of techniques that can be varied when one isn’t proving effective. As you fish more often, you’ll get a feel for what works best in particular situations.
If you’re on a party boat, take advantage of the knowledge of more experienced people. For example, if that old man who fishes the boat every other day is bringing up fluke after fluke, he might be in a groove with his cadence. Take a minute to study his technique, and then try it out yourself.
Setting the Hook
This is easily the most challenging and exciting part of fluke fishing.
Fluke are kind of peculiar in the way they feed. Unlike some fish, like sea bass and striped bass, that hit the bait hard and require a quick, firm pull back on the rod in order to completely set the hook in their mouth, fluke take their time and require a bit of patience.
Sometimes they’ll give the bait a quick pull and drop it. Other times, they might hold it lightly in their mouth without fully committing to eating it. They’ve also been known to lay on the bait, covering it with their flat bodies.
What this means is that you’ll be able to feel the pull and pressure of the fish before they’ve actually taken the bait. If you try to set the hook by pulling quickly at the first signs of a fluke on the line, you’ll likely rip the rig away from them or accidentially snag the fish.
Focus on controlling the urge to immediately set the hook at the first sign of a bite. This is no easy task when you’re anxiously waiting for a fish, especially if you typically go for other fish that require quick reaction times, but if you can master the control of this reflex reaction, you’ll increase your chances of hooking the fluke.
Once you’ve felt the fish on the other end and have controlled your urge to reflexively set the hook, you can do one of two things.
The pro move is to let a little bit of line out, also known as freespooling. Doing this prevents the rig from dragging away from the fluke and allows it the time and comfort to make its decision to fully take the bait.
Give a 5-10 second count as you’re releasing, set the line, then give a slow pull up to test for continued resistance indicating the fish is still on the line and now being dragged.
Then…
Hit it hard! Give a sharp, quick pull that will hopefully set the hook firmly in the fish’s mouth.
If you attempt to set the hook and it feels like you’ve lost it, don’t reel up just yet. Instead, allow the rig to float back down to the bottom. There is a good chance the fish is still there and may strike again. If you don’t feel anything after a bit of bouncing and waiting, reel up to check your bait.
The other technique (or lack of technique) for hooking a fluke is known as deadsticking. Instead of releasing a bit of line once you’ve felt the first signs of a strike, you just do nothing. Then the steps are the same, do a 5-10 second count, pull up slowly, then set the hook if the fish is still on the line.
Opting to do nothing and just let the line sit is less effective than releasing line but still a lot more effective than acting reflexively and yanking the bait away the second you feel a pull.
Reeling in
Congrats, you’ve got a fluke on the line! The technique for reeling it in is about the same as it is for any other type of fish. Here are a few tips to keep in mind.
Keep tension on the Line
Not too much tension though! It’s important that the fish always feels the pull of the line but setting the drag too tight could lead to a broken line or pulled hook.
Although you want to be careful about setting the drag too loose. If the fish is fighting, especially a big fish, let it have a bit of line and go for a run. While this is happening, be sure to maintain some tension on the line. Eventually, it will tire, and you’ll have the opportunity to pull it up.
Pull Up, Reel Down
Once you’ve set the right amount of drag and feel that you’ve got the fish under control, it’s time to reel it in. A common mistake many beginner (and overexcited) fishermen make is to reel in with the rod at a fixed angle.
What you should do instead is first pull the tip of the rod up (without reeling) from about a 45 degree angle to a 90 degree angle. Then, begin to reel as you drop the rod back down to again. Most important to keep in mind is that tension needs to be maintained at all times. Any slack line can result in a lost fish.
What this accomplishes is essentially pulling (not reeling) the fish up towards you.
Repeat this process until you’ve landed the fish.
How to Catch Fluke – Good Luck!
Mastering the art of fluke fishing is a matter of time and patience. Sometimes they just aren’t biting, and no changes to your rig or technique will change that. It’s why they call it fishing, not catching.
The important thing is that you keep on fishing and applying the fundamentals on how to catch fluke you’ve learned here.
Given enough effort, you’ll inevitably present the right rig, in the right way, to a hungry fish that can’t help but strike. And when it happens, you’ll know just what to do to land it.
Good luck and enjoy the fight!